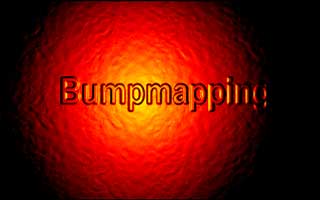
*Tutorial on 2d-bumpmapping*


2d-bumpmapping is one of the simplest and at least I think
it looks very nice. In this tutorial you will learn to make
a simple bumpmapper for your demo,game or whatever. I will
write the code in pascal, but it shouldn't be too hard to
translate it to C++ or so.

What is bumpmapping?
For those of you nerds who doesn't know what bumpmapping is
I can tell you it's a cool effect that make the surface of
something look bumpy. Look at the example file.


The first thing we have to have is a environmentmap. That
is the lightsource it self. It looks pretty much like a
phong light, if you have seen one. The environmentmap
is a 256*256 array or bytes.

environmentmap=Array[0..255,0..255]of byte;

Now if you use TP 7.0 like me, you have to be a litte sad.
Cause TP can't handle arrays that big. It's one byte too big.
So this is the one I use:
environmentmap=Array[0..255,0..254]of byte;

Procedure CreateEnvironmentMap;
var i,j:integer; nX,nY,nZ:real; (float)
begin
for i := 0 to 255 do
 for j := 0 to 254 do begin
   nX:=(i-128)/128;
   nY:=(j-128)/128;
   nZ:=1-sqrt(nX*nX+nY*nY);      (*get the unit vector*)
   if nz<0 then nZ:=0;
   environmentmap[i,j]:=Round(nZ*256);
  end;
end;

Now, that was very difficult, was it. It won't get any harder either.

You will have to have some kind of array that is the surface to be
bumpmapped. I use a virtual screen for mine. Dark color in the
surface are high and bright colors are low.

Then, for every pixel you draw you check the pixels closest neighbours.

  nx:=bumpmap[x-1,y]-bumpmap[x+1,y];
  ny:=bumpmap[x,y-1]-bumpmap[x,y+1];

Then the distance from the pixel to the centre of the light

  lx:=x-lightx; (*Where lightx and lighty is the position of the*)
  ly:=y-lighty; (*light i.e 160,100*)

Then decrement the nx and ny values with lx and ly.
After that, increment nx and ny with 128;

Check that it's in the range
  if (nx<0) or (nx>255) then nx:=0;
  if (ny<0) or (ny>255) then ny:=0;
The draw the pixel
  putpixel(i,j,environmentmap[nx,ny]);

That it, pretty simple, isn't it. Now, why is this effect useful.
Well, you can do some really cool demoeffect, like a combined plasma
and bumpmapper. A maybe you the effect in games.
How about a C&C clone with bumpmapped ground.
Would, look a lot more realistic.
Bumpmapping is also used in 3d-games. The only one i've seen yet is
the faboulos game: MechWarrior 2: Mercheneries. The ground in some
levels is bumpmapped, very nice. BTW, the code contained in the
package wont compile without my units, so it's only for your viewing
pleasure.

Thanks and goodnight, Hackurd!

mail: cptomte@pemail.com , cptomte@mailcity.com ,
      cptomte@imatrekkie.com

url: http://members.tripod.com/~hackurd/

1 March 1998
|
 Hackurd

 Hackurd
